
Related Articles
Painting a car to a desirable state is a process that involves step by step meticulous techniques. Leaving one step out could make the process faster and easier but will certainly leave a bad paint job. We’ll be going through these steps so as to know what is done by the painter behind closed doors and to also know when we are potentially been reaped off.
Painting a car requires a suitable environment with zero dust around and excessive moisture which means that you cannot paint your car in the open air. You need to have a closed room for this purpose; a room with no dust and extra moisture than required is very ideal.
Sometimes the body of a car is not in good shape and covered with many dents and scratches. The first thing you need to do is clear those dents because successful painting requires a smooth surface.
After the dents are removed, you might still find a few irregular areas on the car, which needs fixing before painting. There are many body filler putties in the markets these days. Filler materials need to be mixed before applying after which it is applied evenly over the uneven area with the help of a clean spreader or buffing pad. In some cases there are holes very small that you will need to use filler material called glazing material. This glazing putty is much thinner than ordinary fillers and perfect for filling the places which are not done by thicker fillers.
Body filler doesn’t dry it cures via a chemical reaction. To speed up this process, you can use a hand dryer or a heat lamp. After the putty has cured completely, you might notice a few bumps on the edges. For this purpose, sandpaper is used to balance all areas.
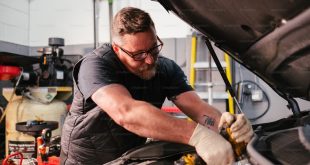
Before painting, previous paint has to be removed with the help of sanding. A hand sander is not recommended for this step as it will be almost impossible to remove all the paint with it. Even the electric orbital sander takes a lot of time to remove all the paint and make the vehicle ready for the new paint, so you have to be very patient in this step. A high-speed sander is good for this step as it will allow you to work quickly; having an electric sander is a must.
While sanding the vehicle, keep in mind to apply the same pressure to all the areas, so that same amount of paint is removing from each part. Moreover, if you want a different colour for your car, then you have to sand till the bottom to the bare metal so that you won’t see the old color showing from there. After each pass, you will see your paint fading away. Always use sander in a circular motion for better result and smooth area.

It often happens that small spots are left from the old finishing. This can cause a bad result because automotive paints and primers don’t stick to glossy areas that well. Patience is required not to ignore any small area. Take a closer look and correct this.
After completing the sanding process, you have to move to the next step that is cleaning. Cleaning is important to avoid any dust particles to become a hurdle in your way. The dust particles from sanding will be stuck to your fresh paint, making it look awful. So a wet cloth is used to clean the exterior of the vehicle. Make sure the area is scuffed properly.
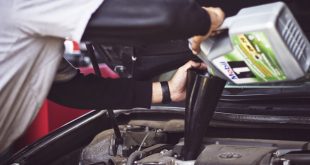
After you are done with the entire previous steps, you now put primer on your vehicle. But before that, mark all the areas where you don’t want to put primer. You can cover those areas with a newspaper and put the tape on the edges to secure them. It will protect that area; especially the tyres which need to be sealed properly before painting, so no primer gets on it.
A sprayer is always useful in priming, it spreads the primer evenly all over the area, and it makes the task easy as it will speed up the process. The primer needs to be properly mixed for a perfectly thin coat. Also, use a good epoxy primer for your car as it will stick properly.
Wait some time for the first coat to dry completely. After it has dried, sanding is done for a smooth area for the next coating. Sanding on wet surface will rub the primer off, so it’s better to wait for an hour or so.
Sometimes visible inconsistencies and uneven spots can be seen after the first coat. A block sander is perfect for this task, 1200 grit sanding block is recommended. Use it in curves and circular motion but don’t put too much pressure, making it even so that it matches the surroundings.
Repeat the above procedure 2 to 3 times for great finishing. But don’t sand until primer has completely dried off. Wait for an hour after every coat and then do the sanding for the next coat. Two to three coats are enough for your car. Finally, your car is ready for paint.
Painting is very much similar to priming. Mix the paint with thinner and apply it on the primer. Allow it to dry for an hour, just like a primer. Then apply a few more topcoats of the thin paint. Two layers won’t be enough, three to four coats are recommended to cover all the areas. Before the final paint, wipe the car with a clean cloth. After applying the last and final coat of paint, wipe the car again all the way down, after the paint has dried.
There are many steps to be taken for a successful painting. It is time consuming and requires patience. If you miss steps just for the sake of completing the task quickly, you might experience bad result. Sometimes a car can show signs of immense rust, in this situation you should go to a professional and apply a whole new coat before you can begin your painting. You can reach a professional by making an appointment HERE
